How to Make a Group in Gmail Account
Gmail is one of the most used and preferred email clients around the world. Every now and then one needs to send an email to multiple people at once. You must be doing it manually and wondering if there is a way to create email group in Gmail? Is this possible? The answer is yes. There are tools that will ease your job.
In this blog, we will show you how to create a group email in Gmail using two methods: First is the professional method that requires a specialized tool and gives you scalable reports, while the other method is the conventional Gmail method. (advisable to be followed if you send group emails occasionally and don't require recipient's engagement data)
There are two ways to create a Gmail group.
- Professional Method (scalable way)
- Gmail Method (the conventional way)
Here we are going to demonstrate how to create a mailing list/ a group email in Gmail using both methods, in a quick and easy to understand step by step format. But before we kick off with the "How to," let's quickly go through why having a mailing list in Gmail is great, especially for business cases.
Benefits of Creating Group Email/Mailing List in Gmail:
- Saves time and makes it easier to communicate with multiple groups of contacts frequently
- It is a great way to easily distribute your content at scale
- Segmenting audience lists is an effective way to generate more result driven email marketing campaigns
- Also, an excellent way to keep in touch with relatives, friends and social and work circle
How to Create a Group Email in Gmail: The Professional Method
If you plan on creating and sending group emails periodically for any organizational or business purpose, then this method will ensure a productive, scalable, and goal-driven approach to your group email campaign.
Using a cloud-based, specialized, and easy-to-use contact and email outreach managing tool like SalesHandy, A professional can effortlessly create an email group in Gmail and send/ automate personalized emails to thousands of recipients simultaneously. On top of that, you get to know the most engaged recipients of them in real-time with email engagement insights.
Pros of using the professional method:
- Saves time and resources, increasing productivity
- It is an easy and effective way to create, nurture and manage a mailing list
- You can automate sending personalized emails to your group contact segments and also set-up behavior based automated follow-ups.
- You get recipients behavioral data like email open, link-click and reply notification in real-time
- It makes keeping a check and staying on top of your email campaigns effortless
Cons of using the professional method:
- This functionality of the solution opens in a new browsing tab of your internet browser but its just a small pinch in return of huge efficiency and better results from your email campaigns
So, let's get to it!
Part 1: Creating a CSV
Step 1: Go to Google Contacts
Step 2: Select the contacts you want to add to your group email or mailing list
Step 3: Click on More Actions icon

Step 4: Choose the "Export" Option
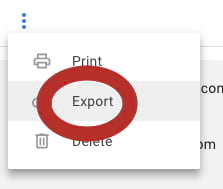
Step 5: Choose "Selected Contacts" in the Export Contacts option and "Google CSV" in the "Export as" option.
Step 6: Click on Export.
You will have a ready to upload CSV at the end of this part. And in case, you have contacts in a Google sheet or an excel sheet, you will have to go to the "File" menu and select the "Download as CSV" option from the drop-down menu.
Now, let's quickly go through the simple steps you need to take to create an email outreach campaign to send to this group email list.
Part 2: Creating a Campaign
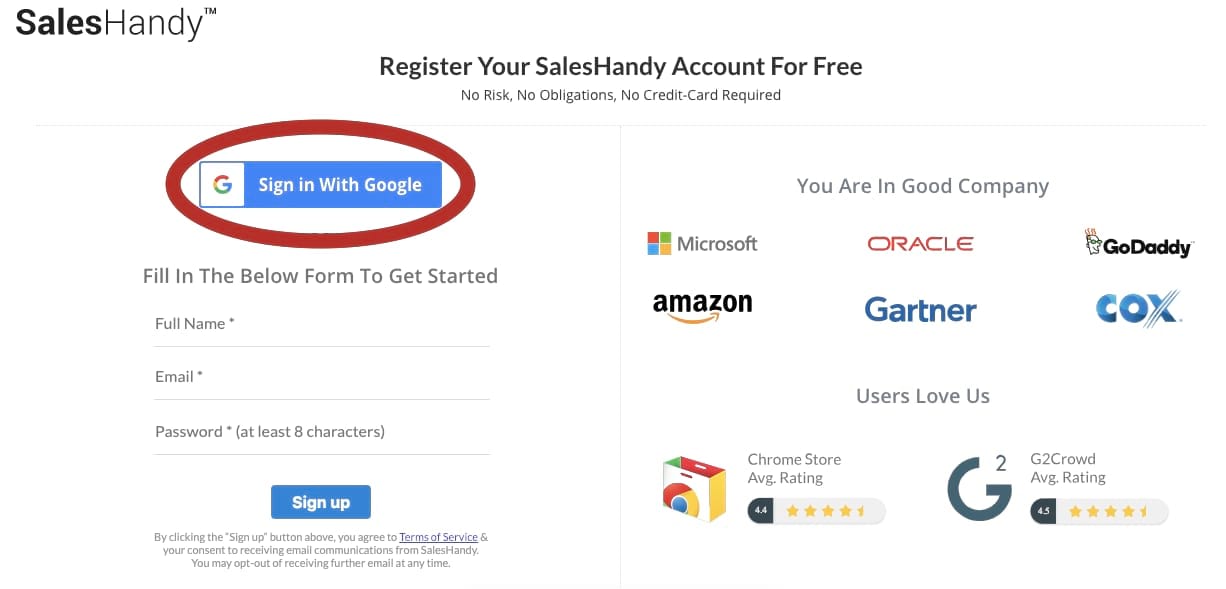
Step 1: Signup for FREE with SalesHandy (If you don't have an account with SalesHandy). Choose Sign in with Google option as we are doing this guide for Gmail but you can also sign up with your Outlook account.
Step 2: You will be redirected to the app dashboard. Before we move ahead with creating a campaign, go back to your mailbox and confirm your SalesHandy account from the confirmation email.
Step 3: As you have now a confirmed account with SalesHandy, go back to the dashboard and refresh the page.
Step 4: Choose the Email Campaign option from the SalesHandy menu.
Step 5: Click on the "New Campaign" button.

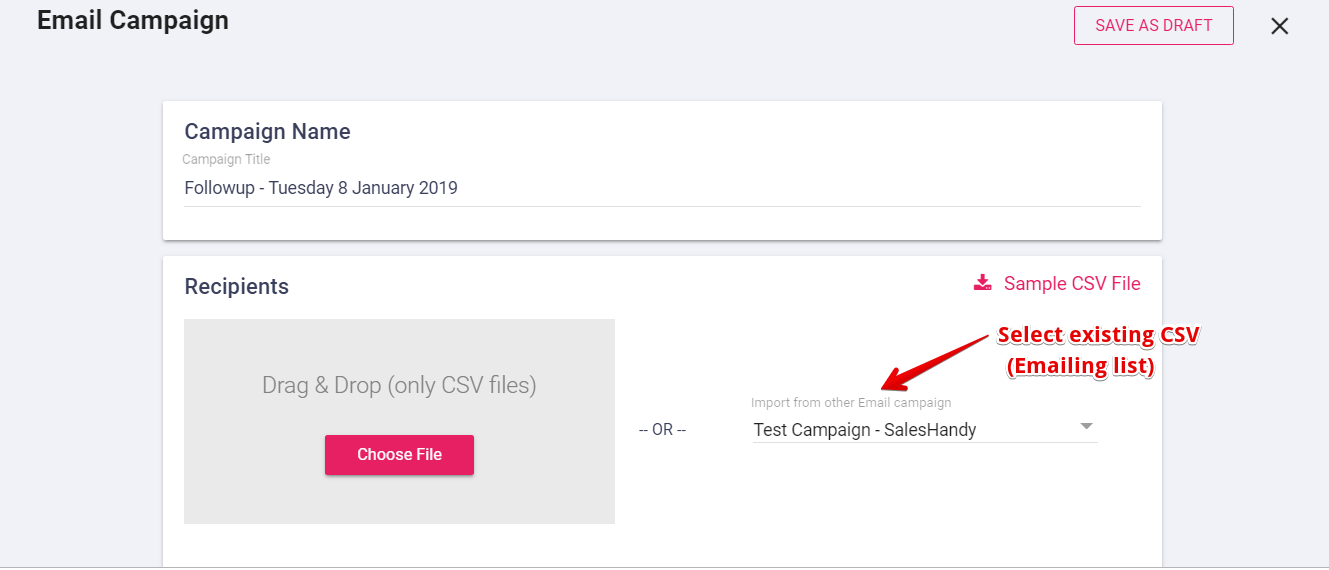
Step 6: Name the campaign. (The name is just for your reference and won't be visible to your recipients)
Step 7: Upload the CSV (created in part 1) in the Recipient's section. Once you've uploaded the CSV if you want you can verify the email list to ensure a lower bounce rate using SalesHandy itself.
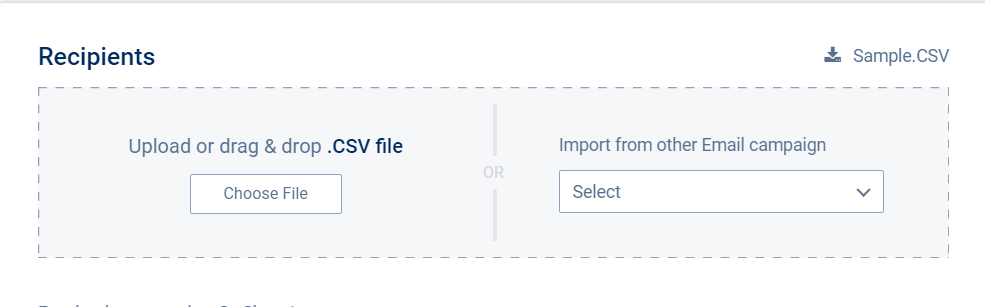
Pro Tip: If you have more than 200 contacts in your CSV then don't forget to select the "Upload more than 200 contacts" option.
Step 8: Choose an account you want to send this campaign from. (This is only applicable for people who have multiple accounts logged in with SalesHandy)
Step 9: Write a subject line, email body, and follow-up emails.

Step 10: Send a test email

Step 11: Schedule the campaign according to the time zone of your recipients.
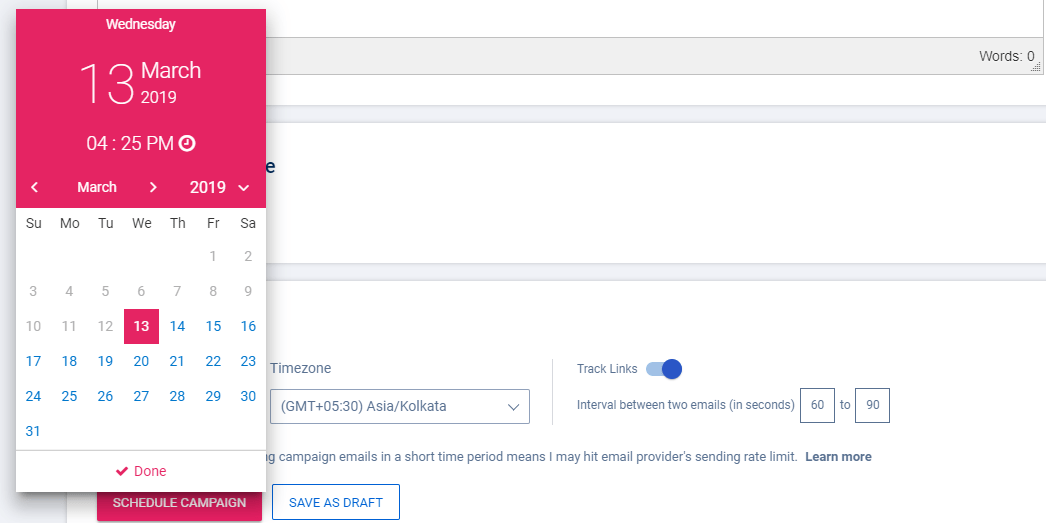
Step 12: Schedule and hit send!
Voila!
You have successfully sent an email campaign by creating a group in Gmail.
Note: If you want to resend a new email to this group again all you need to do is to create a new email campaign from SalesHandy and select this CSV of contact that you have used, frame an email, and schedule at a time you wish.
Additional Advantages of Professional Method (Using SalesHandy)
1. Email Tracking
Making a data-driven action helps in improving your performance. SalesHandy has advanced email analytics, which lets you know all the essential email metrics like open rates, response rates, and bounce rates. With the email tracking feature, you can track who opened your email and if they clicked on your links
2. Automated Follow up
According to a study, only 18% of people respond to the first email. However, follow-ups can triple response rates. SalesHandy empowers you to create automated follow-up email sequences that are sent to inactive recipients who don't open or respond to the initial emails. In your bulk email campaign, you can add up to 9 follow-up stages to boost the reply rate.
Flexibility in setting up the followups:
- Set as per the behavior of the recipient action
- The predefined time interval between two follow-up emails
- Advance personalization using merge tags
3. Advanced Email Personalization
Sending personalized email increases customer engagement which eventually helps in improving the response rate. While drafting your emails SalesHandy lets you use Merge Tags to create advanced personalization. With this feature, you can send up to 5000 personalized emails in a day.
4. Email Templates
Create and save unlimited email templates to eliminate the repetitive task of composing emails that you would be using on a day-to-day basis. If you are using SalesHandy along with your team, you can share the most performing templates for better conversions. You can also use predefined email templates to save time and scale smartly.
5. Domain Blocking
This feature of SalesHandy blocks sending emails to particular domains. Once you have uploaded your CSV file, you can block single or multiple domains just by adding it to the domain blocklist. Emails accounts within the domain blocklist will be skipped from your campaign.
How to Create a Group In Gmail? (The Conventional Method)
Step 1: Go to your mailbox.
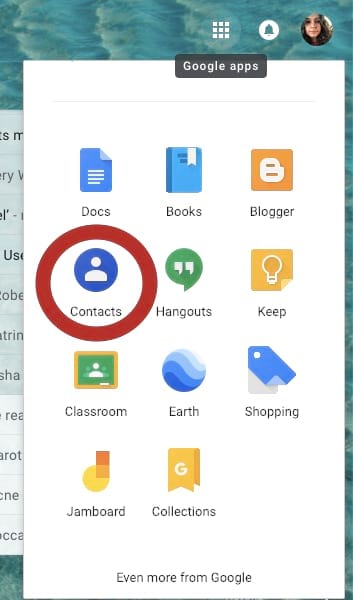
Step 2: Select Contacts from Google Apps tab.
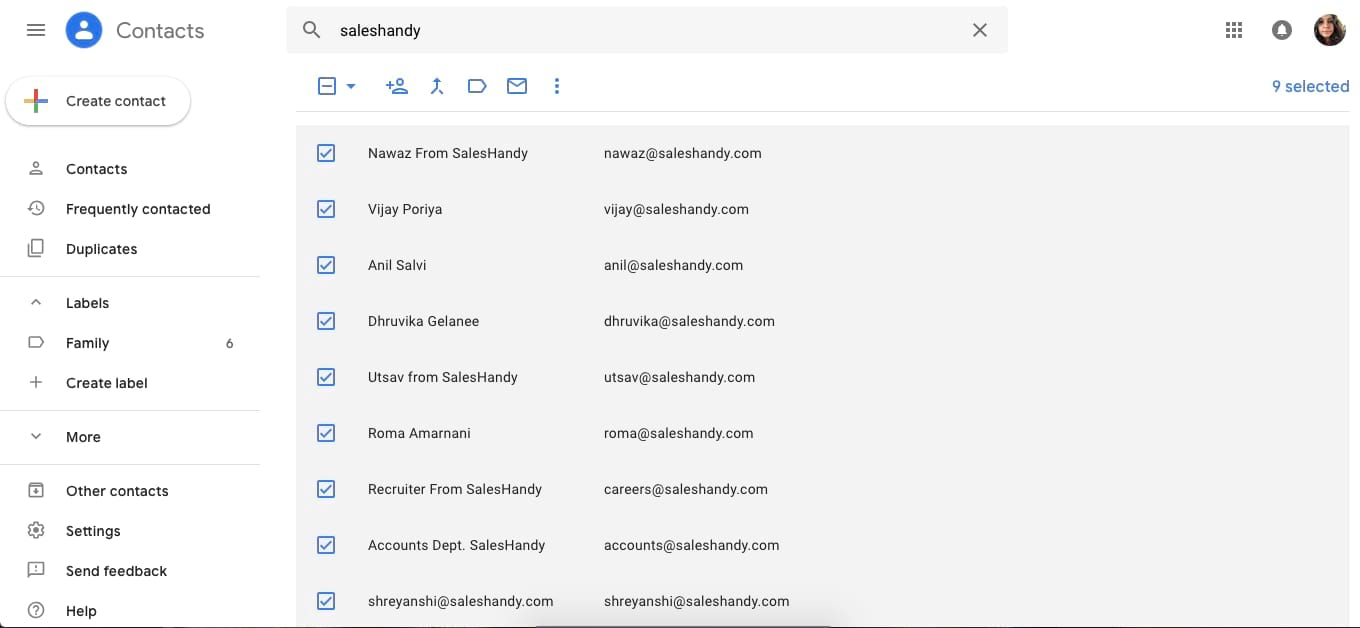
Step 3: Select the contacts you want to add to a particular group.
Step 4: Click on the label icon.

Step 5: Choose "Create Label" from the drop-down menu.
Step 6: Name the group.
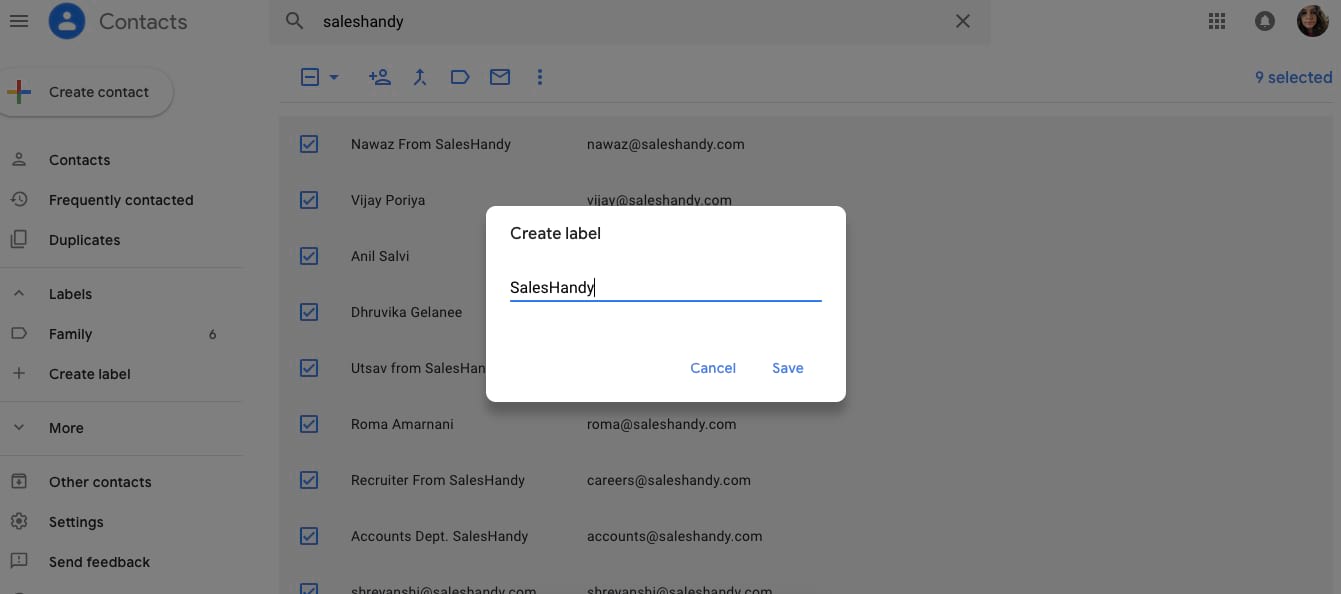
Step 7: Click on Save.
And just like that, you've created a mailing list in Gmail.
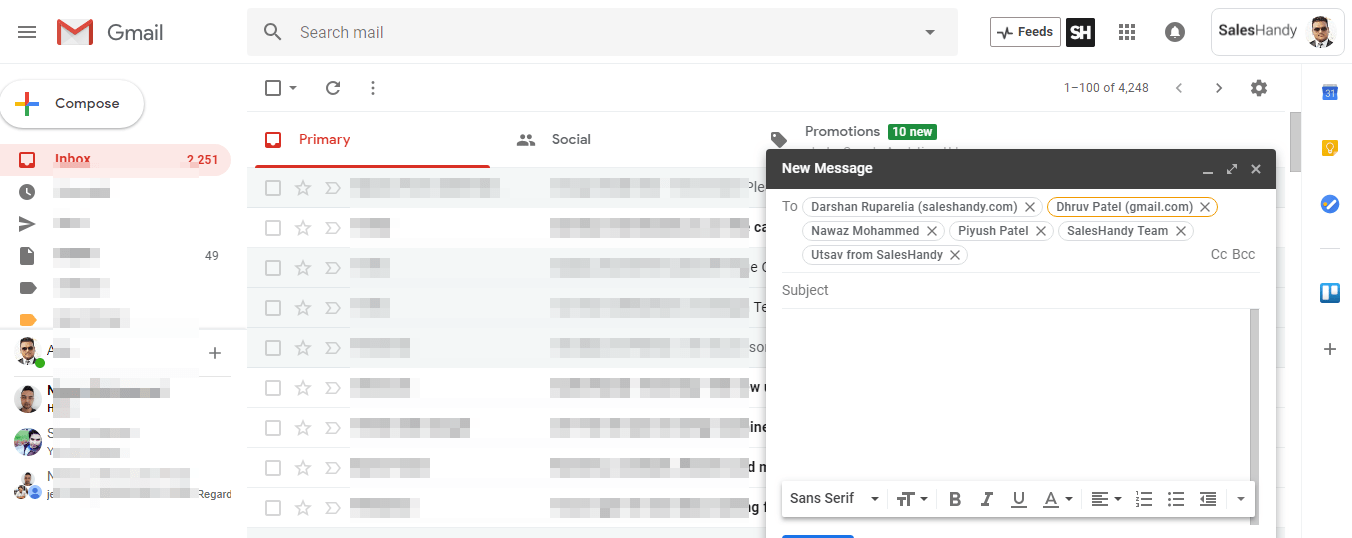
The final step (Sending an email to the created group): Click on compose from your Gmail inbox and type the label name in the recipients' box. You'll be able to see all the contacts that are on that label. Once this list is visible, type in your email and hit send.
Pros of using the Google conventional method:
- It is free and you can outreach these group email lists directly from your Gmail inbox
Cons of using the conventional method:
- You do not get any behavioral data of the recipients, which are at times critical to track to ensure meaningful engagement, like email open tracking and link-click and reply notifications.
- One also cannot set-up an automated follow-up sequence of emails to the email campaign sent, which is very crucial at times to ensure a higher response rate from the email campaigns.
We have also covered how you can set up automated follow-up emails to these group email campaigns in a previous blog which you can refer, in case you want to set these up to improve the response rate of your email campaigns or increase the productivity of the internal team communication.
Next, we have shared two frequently asked questions that email users get while creating a group email in Gmail.
Frequently Asked Questions
Q1: Why am I not being able to see the label option in Google Contacts?
A1: Not to worry. The reason behind not being able to see the label option in Google contacts is you have an older version of Google Contacts. For the older version, you will be having a "Create Group" option where you can easily create a group email in Gmail.
Q2: How can I edit my mailing list?
A2: It's quite simple. Just click on the contact group (label) you want to edit and click on the more option besides the contacts you want to remove and deselect or change the label according to your wish.
Wrap Up
A mailing list or group email in Gmail can be the bliss of a feature for many small and medium-sized businesses. This feature allows you to reach out to as many people as you want without having to re-write or copy-paste the same email.
With the amount of competition in the market, every business looks for a way to utilize their resources and time in the best way possible. These features can definitely help your business boost its productivity and grow to its full potential.
How to Make a Group in Gmail Account
Source: https://www.saleshandy.com/blog/create-group-email-gmail/
0 Response to "How to Make a Group in Gmail Account"
Post a Comment